Enhance Your Markdown Writing Experience with a Custom VS Code Profile
Profiles in VS Code allow you to have different sets of extensions and settings. For example, you could have one profile for React projects and another for Python projects.
In this article, we will create a profile specifically for authoring/writing in markdown. This profile will be very similar to VS Code's built-in Doc Writer Profile Template with a few differences:
Replace Code Spell Checker with Grammarly, as Grammarly not only checks spelling but also grammar and punctuation.
Change the theme to Fresh Material: This theme gives the activity bar on the left side of the VS Code window a distinctive color, making it stand out from other VS Code instances. This helps to reduce cognitive load when multiple instances of VS Code are open.
Change several settings which will be explained later.
Let's jump in...
Creating the profile
Open VS Code
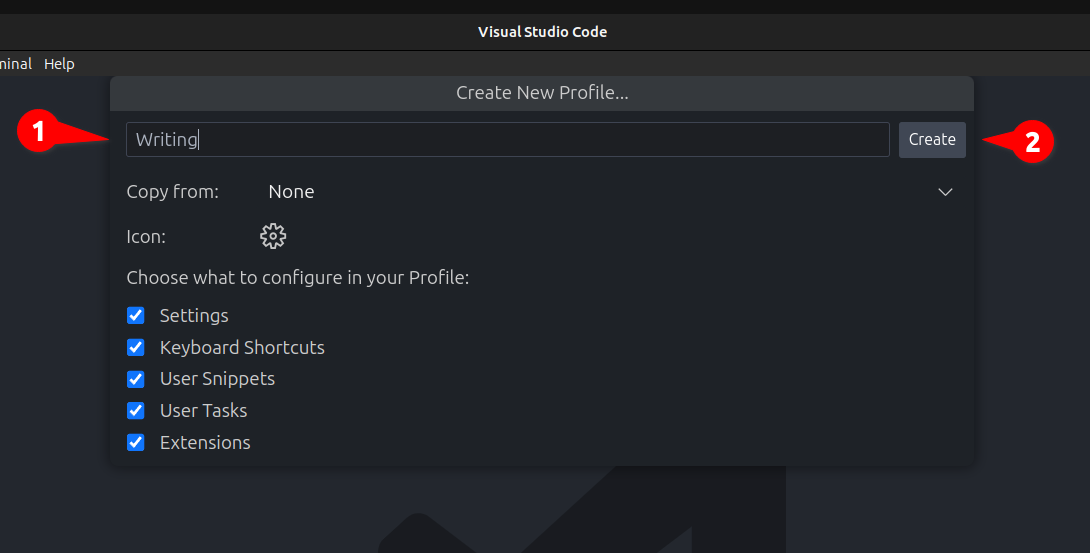
Create a new profile. I've named mine 'Writing', but you're free to choose any name you prefer.
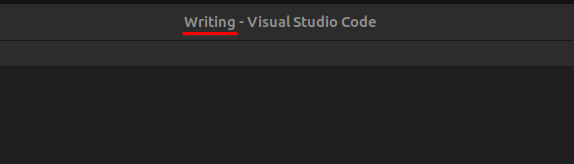
Depending on how you have your VS Code title configured, you may see the name of the title in VS Code's title bar, as shown below.
At this point, your new profile won't have any extensions. We will add these in the next section.
Installing Extensions
To add an extension to a profile, you need to:
Activate the profile to which you want to add the extension.
Add the extension through the normal process.
Here is a step-by-step for adding an extension:
Adding extensions to the new profile is done in the same way as you would normally. Just search for the extension and click ‘Install’. Let’s use the first extension, Fresh Material, as an example:
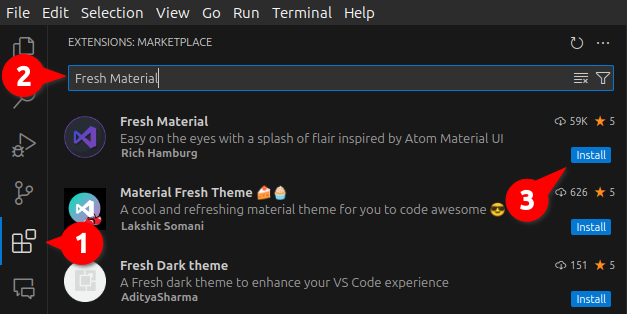
Click the extensions icon in the activity bar.
Type "Fresh Material" in the search box.
Click 'install'.
Now, repeat this process to add the remaining extensions.
We have already added the Fresh Material theme, which gives VS Code a distinctive look.
Grammarly: Integrates Grammarly into VS Code.
Markdown Checkboxes: Adds checkbox/task list support to VS Code's built-in markdown preview and in notebooks:
Markdown Emoji: Adds
:emoji:syntax support to VS Code's built-in Markdown preview and markdown cells in notebooks.Markdown Footnotes: Adds [^1] footnote syntax support to VS Code's built-in Markdown preview.
Markdown Preview GitHub Styling: Changes VS Code's built-in markdown preview to match GitHub's styling.
Markdown Preview Mermaid Support: Adds Mermaid diagram and flowchart tool support to VS Code's built-in Markdown preview and Markdown cells in notebooks.
Markdown YAML Preamble: Renders YAML front matter as a table in VS Code's built-in markdown preview:
markdownlint: Encourages standards and consistency for markdown files.
Word Count: Adds a count of words to the VS Code status bar.
Inspecting the profile
Let's take a look at the contents of our profile so far:
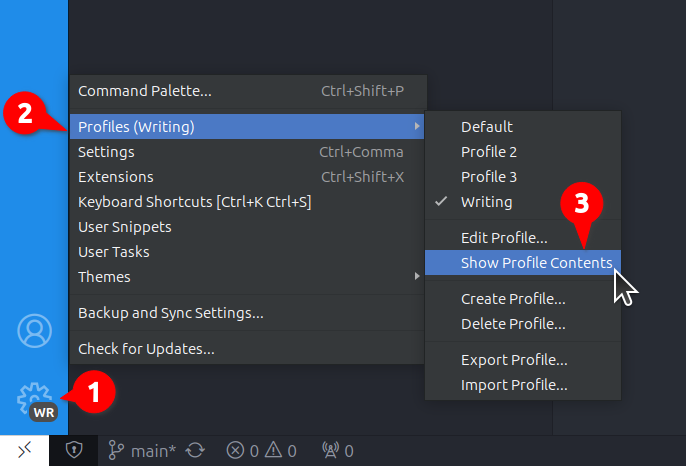
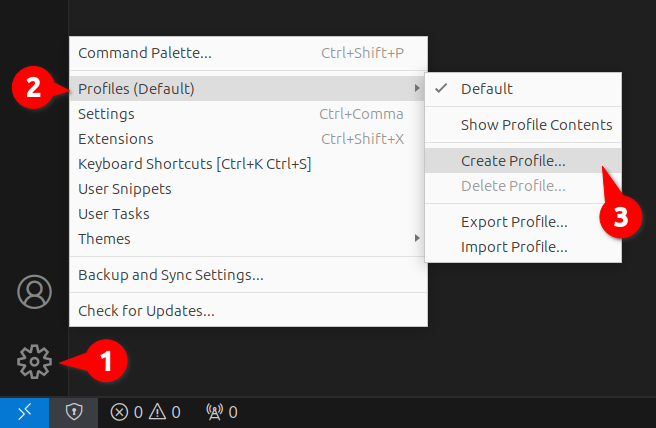
Click on the gear icon at the bottom of the activity bar.
Click on 'Profiles (Writing)'.
Click 'Show Profile Contents'.
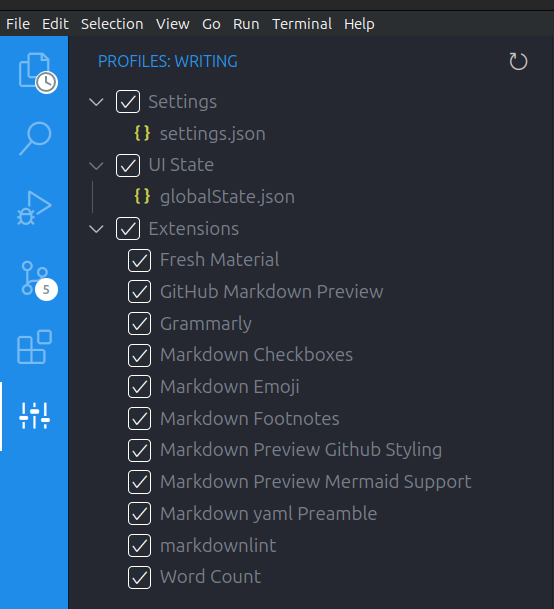
So far, our profile only shows three customization groupings, but VS Code profiles can have up to six types of customization. Here is the list of profile customizations from the VS Code documentation:
Settings - In a profile-specific settings.json file.
Extensions - The list of extensions included in the current profile.
UI state - View layout (positions), visible views, and actions.
Keybindings - In a profile-specific keybindings.json file.
Snippets - In a profile-specific {language}.json files. User
Tasks - In a profile-specific tasks.json file.
settings.json
Each setting change you make while the theme is active will be recorded in
settings.json.
So far, the only setting we have is the color theme set to Fresh Material. Adding the theme was a settings change to the profile, and therefore was added to settings.json. We will add some more settings in the next section.

Update settings
All setting chagnes are optional.
Below are the setting changes that are made by the built-in Doc Writer Profile Template. We will use them as a starting point. However, there are other settings you may want to consider.
    "editor.minimap.enabled": false,
    "breadcrumbs.enabled": false,
    "editor.glyphMargin": false,
    "explorer.decorations.badges": false,
    "explorer.decorations.colors": false,
    "editor.fontLigatures": true,
    "files.autoSave": "afterDelay",
    "git.enableSmartCommit": true,
    "window.commandCenter": true,
    "editor.renderWhitespace": "none",
    "workbench.editor.untitled.hint": "hidden",
    "markdown.validate.enabled": true,
    "markdown.updateLinksOnFileMove.enabled": "prompt",
    "workbench.startupEditor": "none" // turn off welcome and other such pages
Here are my preferred settings:
    "editor.minimap.enabled": false,
    "breadcrumbs.enabled": false,
    "editor.glyphMargin": false,
    "explorer.decorations.badges": false,           // [A]
    "explorer.decorations.colors": false,           // [A]
    "editor.fontLigatures": true,
    "files.autoSave": "afterDelay",
    "git.enableSmartCommit": true,
    "window.commandCenter": true,
    "editor.renderWhitespace": "all",               // [B]
    "workbench.editor.untitled.hint": "hidden",
    "markdown.validate.enabled": true,
    "markdown.updateLinksOnFileMove.enabled": "prompt",
    "workbench.startupEditor": "none"
I made three changes according to my preferences:
- [A] Both Git and makrdownlint use explorer decoration badges and colors so I set this to
true.
- [B] I prefer to see all whitespace markers, so this setting is set to
true.
You can either copy/paste either set of settings or choose and modify them to meet your needs. Just be sure not to overwrite the Fresh Material setting.
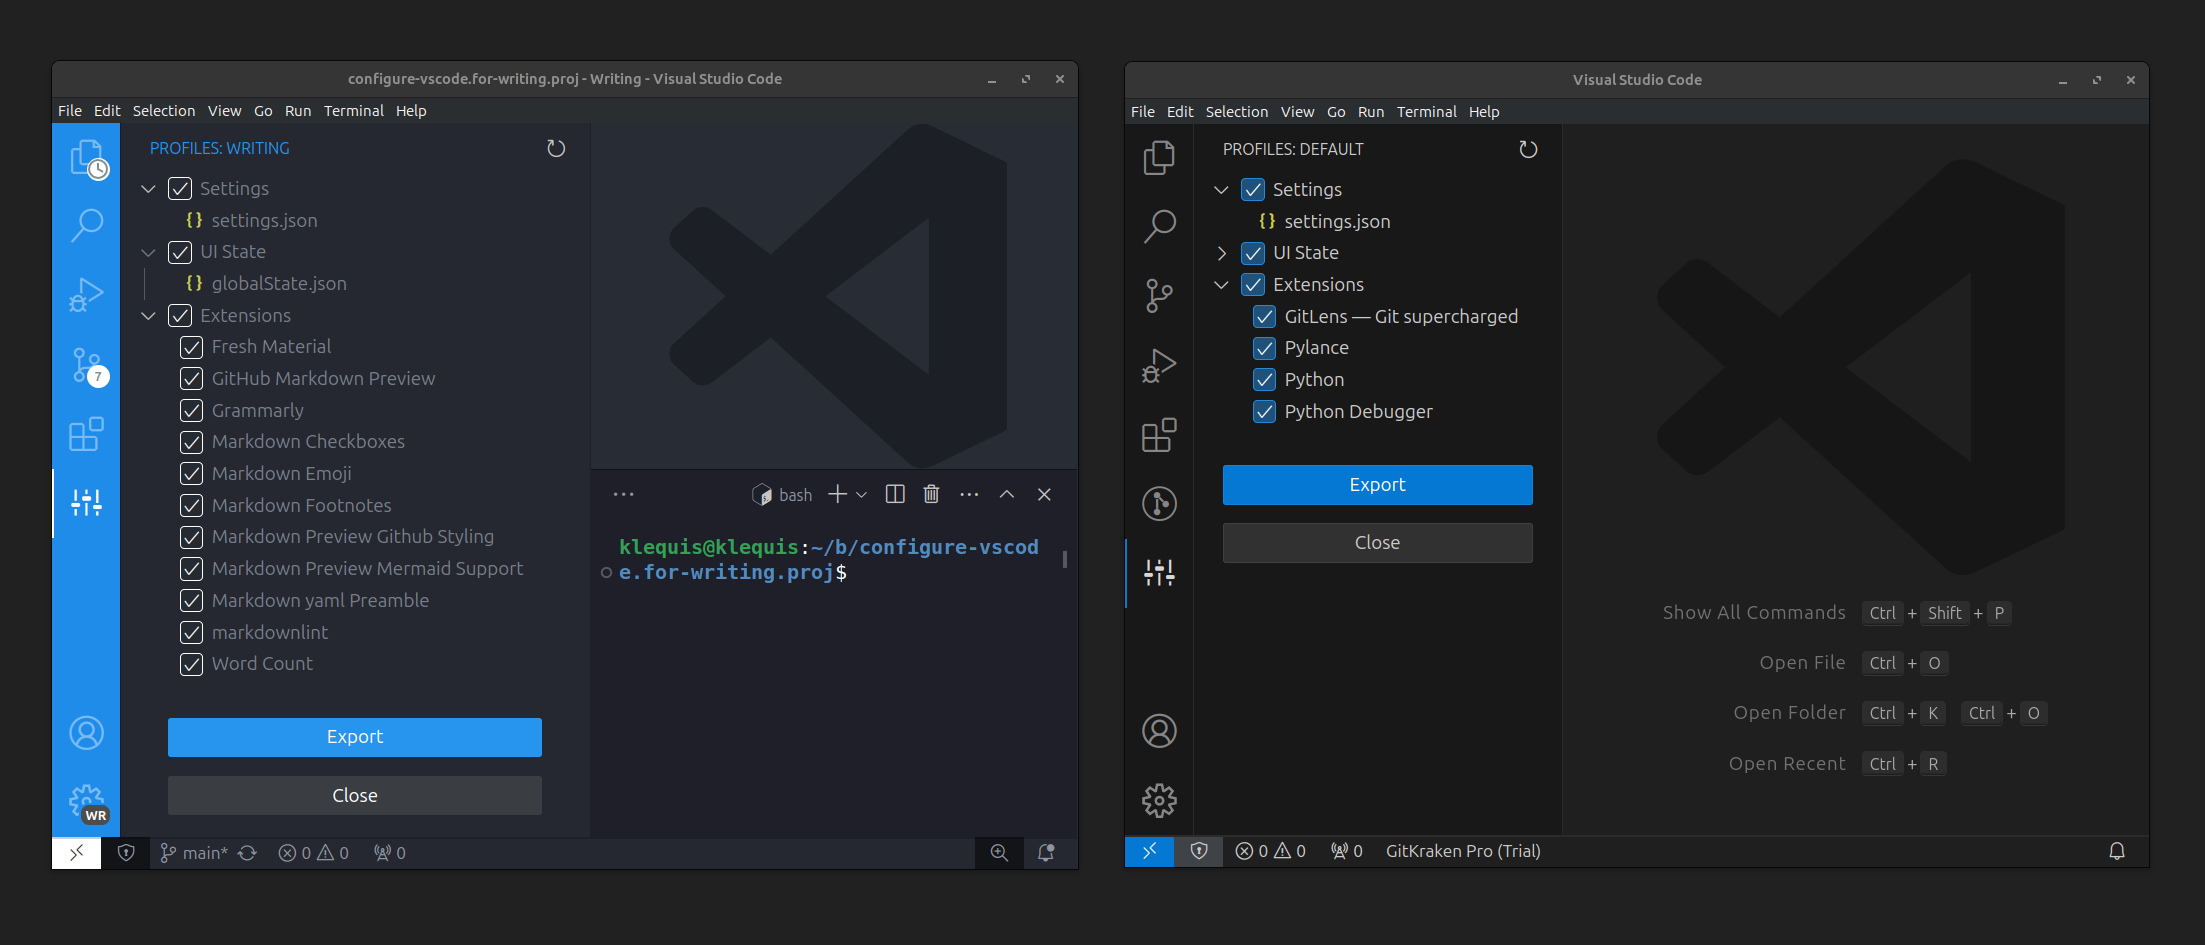
Using two profiles simultaneously
I'm working on a Linux machine. The keyboard shortcut and behavior may differ on your OS.
Having two instances of VS Code running, or as I frequently do, having one open for writing and two or three open with code examples, it is most helpful to have the writing instance look distinctively different than the others so I can quickly distinguish between them.
Launch VS Code.
Select a profile.
Press ctrl+shift+N to open a second window.
Select a profile for the new window.
Now you have different profiles in each window.
Done!
From here you can continue to modify the profile to your liking. All changes will be recorded in the profile's settings.json file.
I hope you now have a more fluid and enjoyable Markdown authoring experience.